BitLocker is a crucial Windows feature that helps secure the data on your PC. The full version of BitLocker is only available on Windows 11 Pro, but you can still use it to a lesser degree on Windows 11 Home. (In fact, it’s one of the best reasons to choose Windows 11 Pro over Home.)
So, whether you’re on Windows 11 Pro or Home, if you aren’t using BitLocker yet, you should definitely start. Here’s everything you need to know about BitLocker and how to get it set up right now.
What is BitLocker?
BitLocker is a secure disk encryption solution that’s built into Windows 11. When your PC uses BitLocker encryption, it stores all the files on its internal storage device in encrypted form.
Modern Windows PCs normally save the necessary decryption key to the PC’s Trusted Platform Module (TPM) for safe keeping. When you log in and authenticate, the TPM releases the decryption key and you’re able to use your computer like normal. The TPM also checks that your PC hasn’t been tampered with before it releases the decryption key.
Since your files are stored in encrypted form, a thief who steals your laptop won’t be able to access them without logging in as you. No one can open up your laptop, take the drive out, and pry into your data — your files would appear scrambled without the decryption key.
Why you need BitLocker on your PC
BitLocker ensures that only you (or someone with whom you’ve shared your BitLocker recovery key) can access the files on your PC.
It’s a huge deal for businesses who want to make sure that confidential data on company systems can’t easily be viewed by anyone. But it’s also useful security for home PC users — especially laptop users — just in case someone happens to get their hands on your PC.
The full version of BitLocker lets you use encryption without signing into a Microsoft account, lets you store your recovery key in the way of your choosing, and allows BitLocker to be used on a wider range of PCs. None of these are available via BitLocker on Windows 11 Home PCs.
BitLocker Drive Encryption vs. Windows Device Encryption
I’ve hinted at this a few times already, but there are essentially two versions of BitLocker. There’s the “full” BitLocker experience that we’re focusing on here, which is called BitLocker Drive Encryption and is one of biggest reasons to upgrade to Windows 11 Professional.
Next to that, there’s also something called Windows Device Encryption, which uses a lot of the same technology to encrypt your PC’s storage in a simplified way — at least, in some circumstances.
Windows Device Encryption is designed to be totally transparent. If you’re using a modern Windows 11 PC and you sign in with a Microsoft account, then Windows 11 automatically enables Device Encryption to protect your PC’s internal storage and upload the recovery key to your Microsoft account. Your PC’s storage will be protected with BitLocker and automatically unlocked whenever you sign in. If you ever can’t sign in to your PC and lose access to your files, you can get your recovery key from your Microsoft account online to regain access. (It also works if you sign in to a workplace-managed PC. In this case, the recovery key will instead be stored by your organization.)
BitLocker Drive Encryption is more powerful and flexible. You can encrypt your PC’s storage without signing in with a Microsoft account, and you don’t have to store your recovery key with Microsoft at all — you can print it out and store it somewhere in your office, all without it ever leaving your PC’s storage. You can also encrypt other drives (including removable USB drives) with a feature named BitLocker To Go. You also have access to lots of extra settings to customize the way the encryption works.
For the average PC user, Device Encryption is great — it’s what’s keeping most Windows 11 Home PCs encrypted. The Microsoft account and recovery key upload requirements ensure that you can’t accidentally lose access to your PC’s files, and even if you lose your recovery key, you can always access it online via your Microsoft account.
A caveat for Windows Device Encryption
At this point, I want to note that some older Windows 11 PCs may not support Device Encryption. It’s up to manufacturers to configure their PCs to work with Device Encryption out of the box.
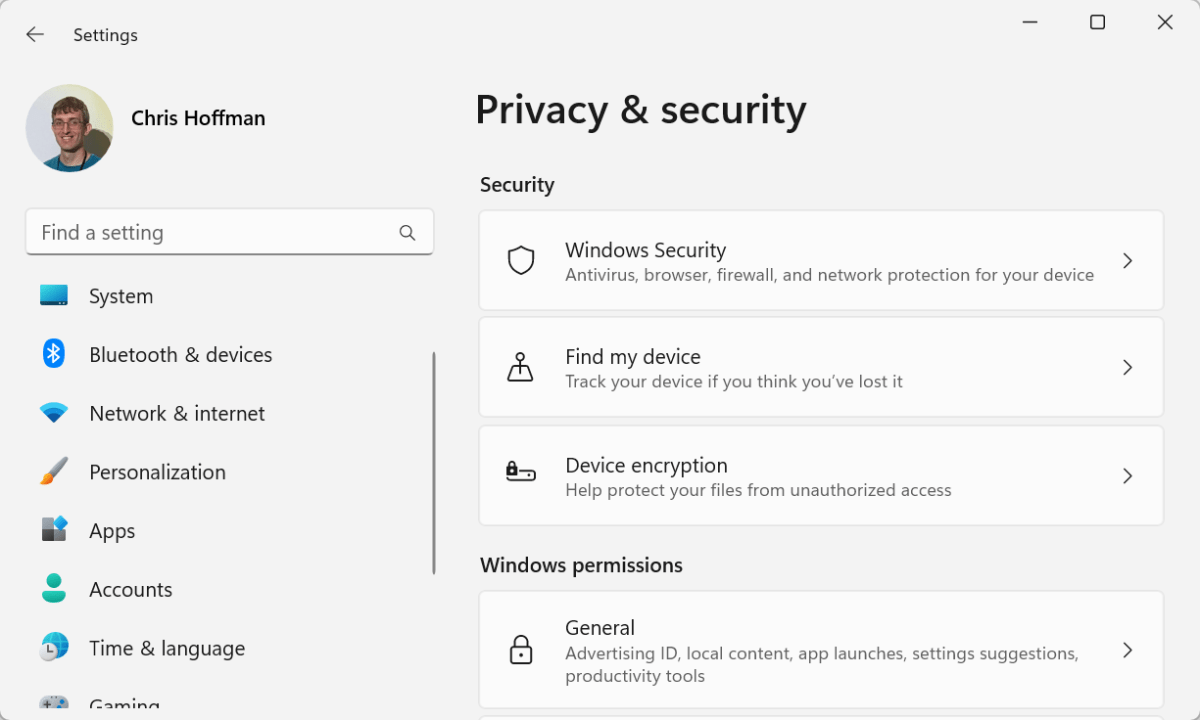
Want to check if your Windows 11 PC supports Device Encryption? Open the Settings app, select Privacy & security in the left pane, and click Device encryption under Security:
Chris Hoffman / IDG
If you don’t see this option, your PC doesn’t have it. If you want it, you’ll have to upgrade to Windows 11 Professional to unlock the full BitLocker experience instead.
Requirements for using BitLocker
For the most powerful and configurable BitLocker experience on Windows 11, you’ll need Windows 11 Professional or one of the other non-consumer editions of Windows 11 (meaning Enterprise, Education, or Workstation). The only edition it’s limited on is Home.
For optimal security, BitLocker also requires a computer with TPM 1.2 hardware or newer. (Remember, BitLocker stores its decryption key in the TPM.) Since one of the most important system requirements for Windows 11 is TPM 2.0, all Windows 11 PCs should support this.
Microsoft spells out a few other obscure requirements, like how your hard disk must be partitioned with two drives, including a small system partition designed to boot Windows before decrypting the drive. Windows 11 automatically creates these partitions when it’s installed though, so it’s nothing you really have to worry about.
And that’s it. If you’re on Windows 11 Home and want to unlock the full potential of BitLocker, see our guide on upgrading to Windows 11 Pro without reinstalling the operating system.
What to know before using BitLocker
BitLocker can make data recovery a bit more complicated. If your PC dies and you have to pull the storage device from it and plug it into a separate PC to recover your data, you won’t be able to view the files on it — until you provide your BitLocker recovery key, which is stored in your Microsoft account online (with Device Encryption) or wherever you chose to personally save it (with BitLocker Drive Encryption).
Naturally, this is also what prevents thieves from accessing your files. No one is getting access to them without your recovery key.
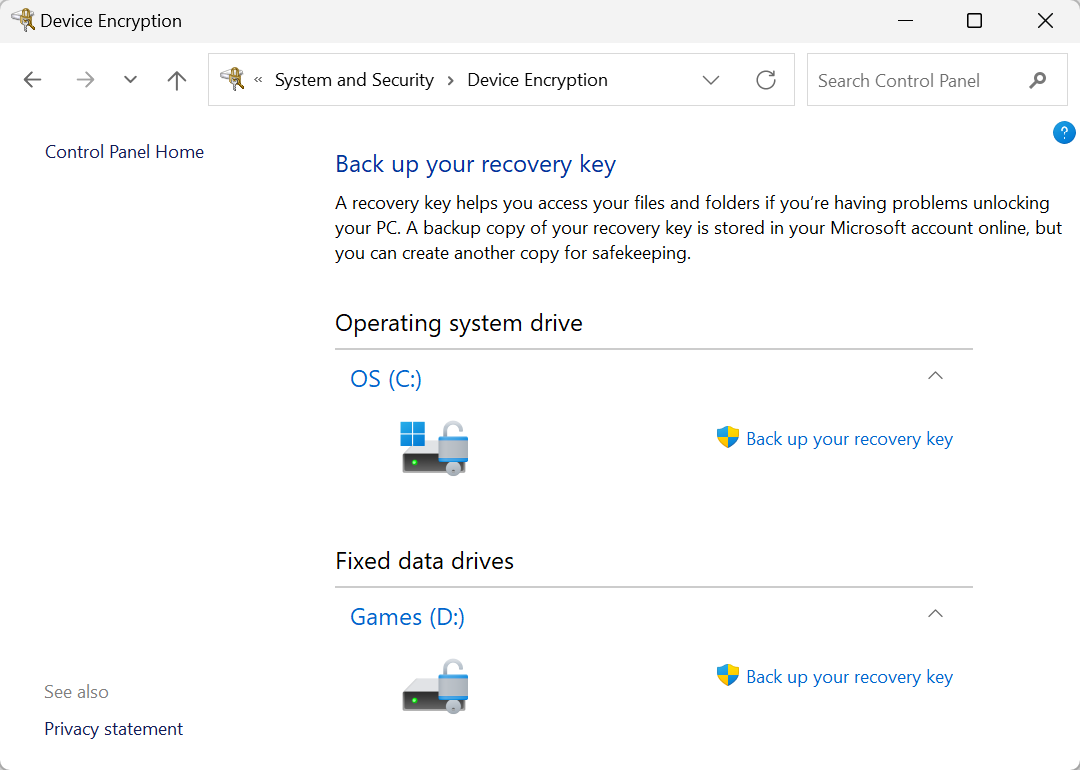
Your BitLocker recovery key is crucial. Let’s say you use BitLocker Drive Encryption to store your files and you later experience a problem with your PC and need that recovery key. If you don’t have it anymore, you’re toast. Those files are irretrievable. If you don’t have a copy of the recovery key, hopefully you at least have backups of those files!
Chris Hoffman / IDG
BitLocker may also reduce your PC’s storage performance. You’ll see the claim that “BitLocker slows SSDs by up to 45 percent” online, but that isn’t the full story — that’s just the result from one particular synthetic benchmark on one particular PC configuration. The precise performance impact will depend on your PC’s hardware, the workload you’re putting your storage through, and your BitLocker settings.
If you have a desktop gaming PC or high-end workstation that sits in a room in your home and you’re more worried about getting maximum performance than someone stealing it and snooping on your files, you may want to leave BitLocker disabled.
On the other hand, if you use a laptop for work — or even just personal tasks — then a potential small slowdown is a reasonable price to pay to ensure your sensitive files are protected in case you ever find your laptop lost or stolen. Modern laptops are pretty fast, and you almost certainly won’t notice a difference in productivity applications and web browsing performance when you have BitLocker enabled.
Setting up BitLocker on a Windows 11 PC
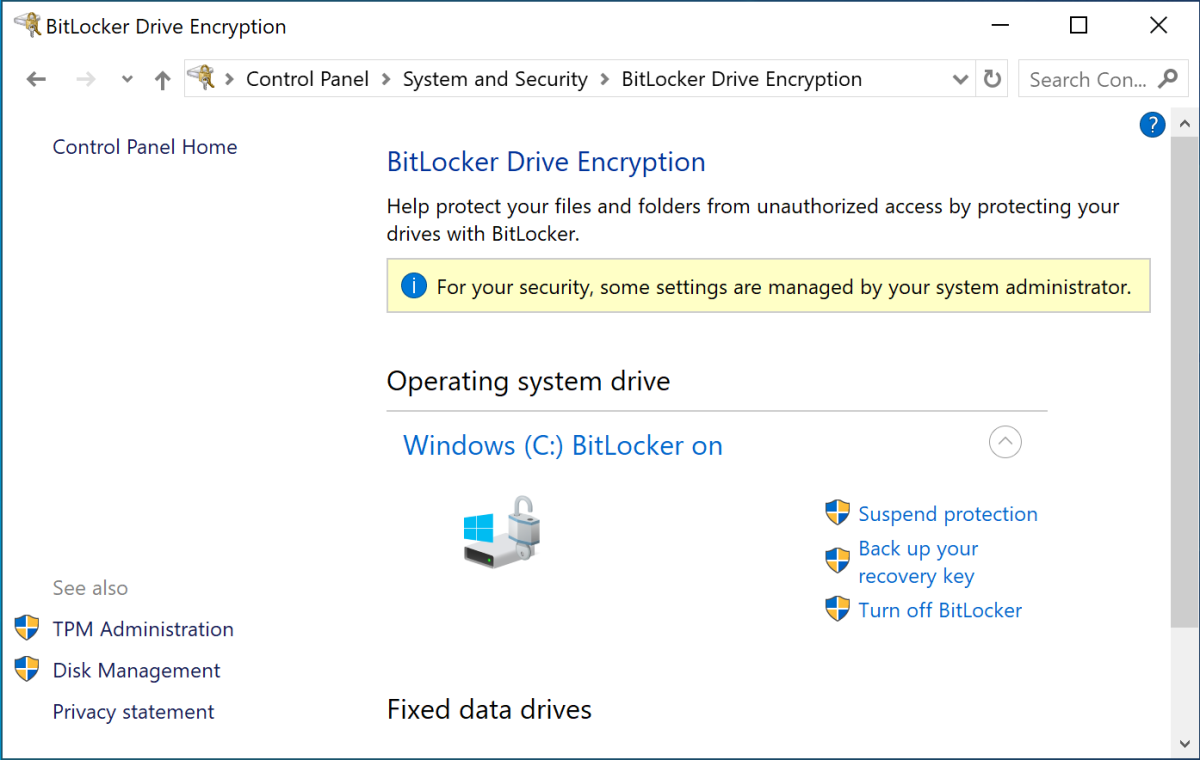
To activate BitLocker Drive Encryption on your Windows 11 PC, you’ll first need to upgrade to Windows 11 Professional if you haven’t already done so. Then, you can open the classic Control Panel and search for “BitLocker” to find the BitLocker settings. From here, you can activate (or deactivate) BitLocker for any drive:
Chris Hoffman / IDG
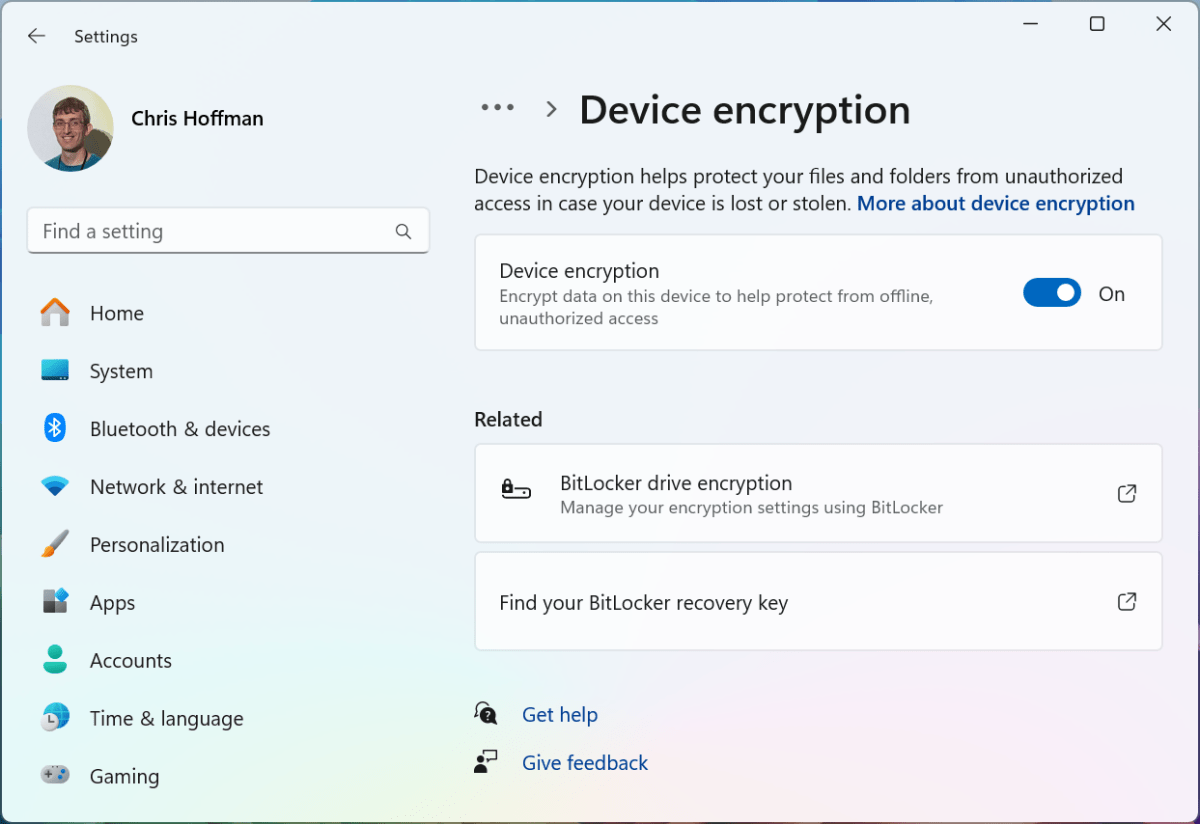
Want to use Windows Device Encryption instead? Head to Settings > Privacy & security > Device encryption to find the settings for it. (If you don’t see Device Encryption as an option on this page, your PC doesn’t support Device Encryption.)
Chris Hoffman / IDG
Device Encryption should be enabled by default if you sign in with a Microsoft account. But to ensure it’s enabled, visit this settings page, check that it’s toggled to On, and be sure to sign in to Windows with a Microsoft account (not a local user account).
Keep in mind when using BitLocker…
When using BitLocker, the most important thing is that you need to keep tabs on your recovery key. If you lose it, you’ll lose access to all the files on your PC — and so you should store it with your Microsoft account online unless you have a good reason not to.
If you choose not to store your BitLocker recovery key with your Microsoft account online, you’ll want to store it somewhere else safe and secure. You may want to print it on a piece of paper and store it in a physical safe, for example. It’s also a good idea to have up-to-date backups of your files, whether in the cloud or on a local storage device.

