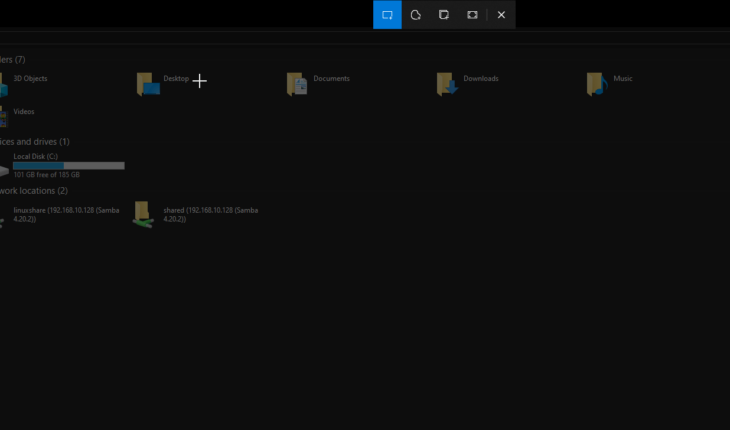
Taking a cropped screenshot on Windows 11 or 10 can be done using the default built-in tools or with the help of any third-party tool. Capturing a cropped screenshot allows us to avoid unnecessary content; hence, in this article, we learn about the Windows 11 built-in tools and shortcuts for taking cropped screenshots.
Capture Cropped ScreenShot on Windows 11 with mouse pointer
1. Using Snipping Tool
The snipping tool offers one of the greatest and fastest ways to take a cropped screenshot with the mouse pointer on Windows 11. Users need to drag the mouse pointer to capture custom areas of their screen effortlessly.
Steps:
- Press
Win + Sto open the Search bar. - Type Snipping Tool and select it from the results.
- Click New in the Snipping Tool window.
- Your screen will dim, and you’ll see four snip options at the top:
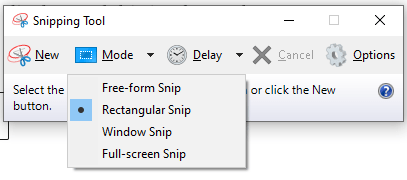
- Rectangular Snip: Select a rectangular area.
- Freeform Snip: Draw a custom shape.
- Window Snip: Capture a specific window.
- Fullscreen Snip: Capture the entire screen.
- Choose a Rectangular Snip or Freeform Snip for a cropped screenshot.
- Select the area you want to capture by clicking and dragging your mouse.
- Once captured, the screenshot will appear in the Snipping Tool editor, where you can annotate or save it.
2. Using Windows + Shift + S Shortcut
Another way to capture cropped screenshots on Windows 11 is using the keyboard shortcut, i.e., Win key + Shift + S shortcut, which is one of the quickest ways to do so.
Steps:
- Press
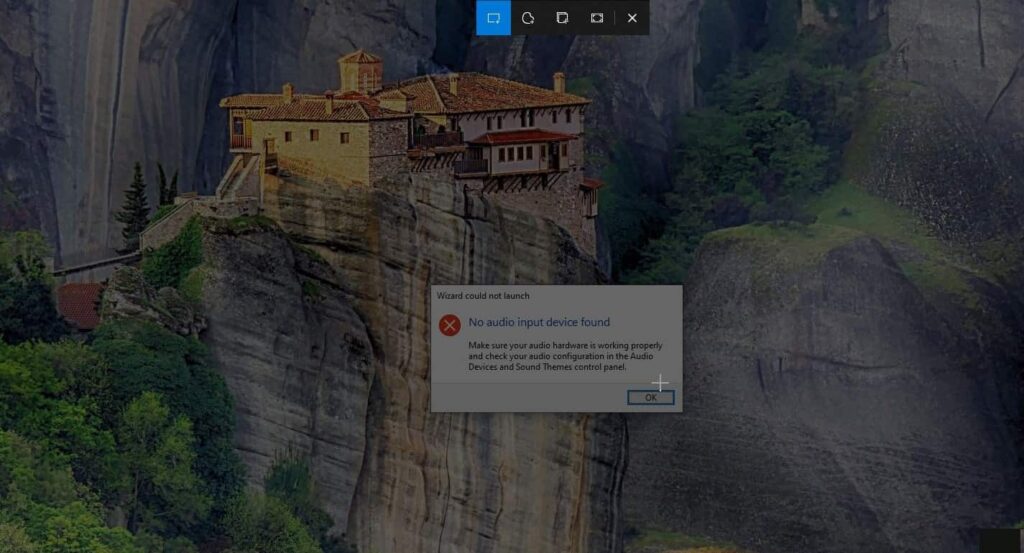
Win + Shift + S. - Your screen will dim, and a small toolbar will appear at the top with these options:
- Rectangular Snip
- Freeform Snip
- Window Snip
- Fullscreen Snip
- Select Rectangular Snip or Freeform Snip.
- Drag your mouse to select the area you want to capture.
- The screenshot is automatically copied to your clipboard.
- Open an app like Paint, Word, or an image editor, and press
Ctrl + Vto paste the screenshot. - Save the image in your preferred format.
3. Using Snip & Sketch Tool
The Snip & Sketch tool is an enhanced version of the Snipping Tool with additional editing features. It also allows users to use a mouse pointer to select a particular area on the display that they want to save as a screenshot.
Steps:
- Press
Win + Sand type Snip & Sketch, then open the app. - Click the New Snip button.
- Select the area of the screen you want to capture.
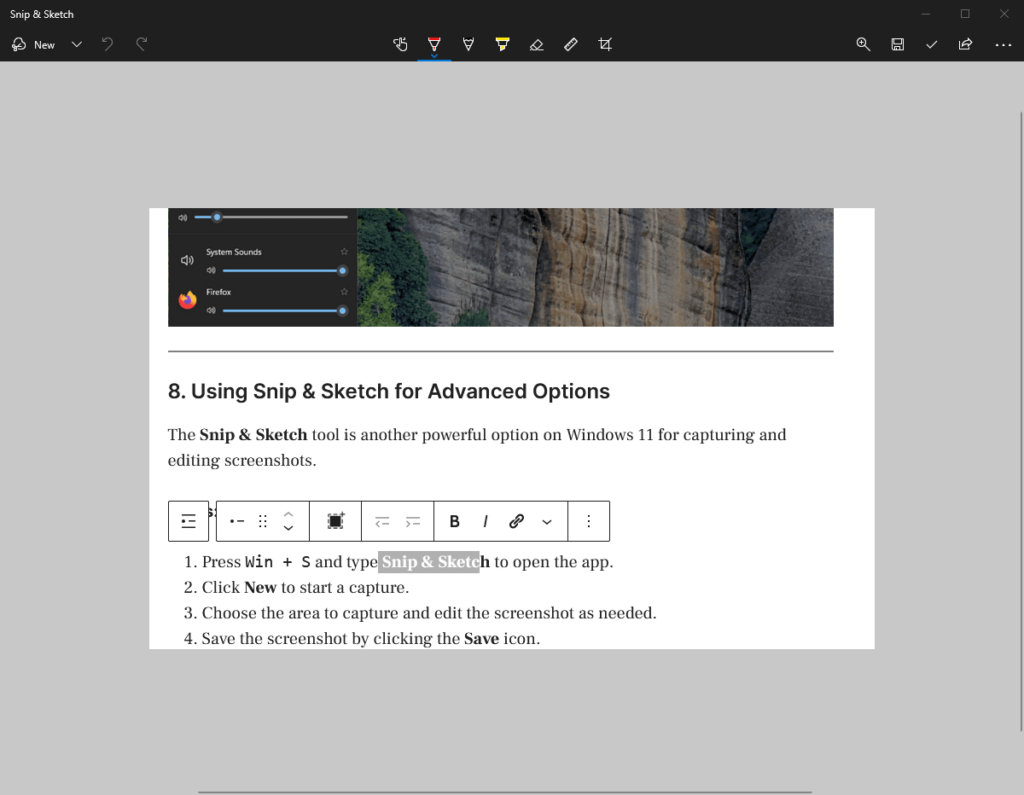
- After capturing, the image will open in the Snip & Sketch editor.
- Use the editing tools to annotate or crop further if needed.
- Save the screenshot by clicking the Save icon.
4. Using Third-Party Tools
For more advanced features, third-party tools can help you take and edit cropped screenshots.
Popular Tools:
- ShareX: A free, open-source tool with powerful capture and editing options.
- Snagit: A premium tool with advanced cropping, annotation, and sharing features.
- Lightshot: A simple tool for quick cropped screenshots.
Steps (Example with ShareX):
- Download and install ShareX from the official website.
- Open ShareX and select Capture > Region.
- Drag your mouse to select the area you want to capture.
- Save or edit the screenshot using ShareX’s built-in tools.
5. Using Microsoft Edge for Web Screenshots
If you need to take a cropped screenshot of a webpage, Microsoft Edge has a built-in Web Capture feature.
Steps:
- Open the webpage in Microsoft Edge.
- Press
Ctrl + Shift + Sor click the Web Capture icon in the toolbar. - Select Free Select to crop the desired part of the webpage.
- Save the cropped screenshot or copy it to the clipboard.
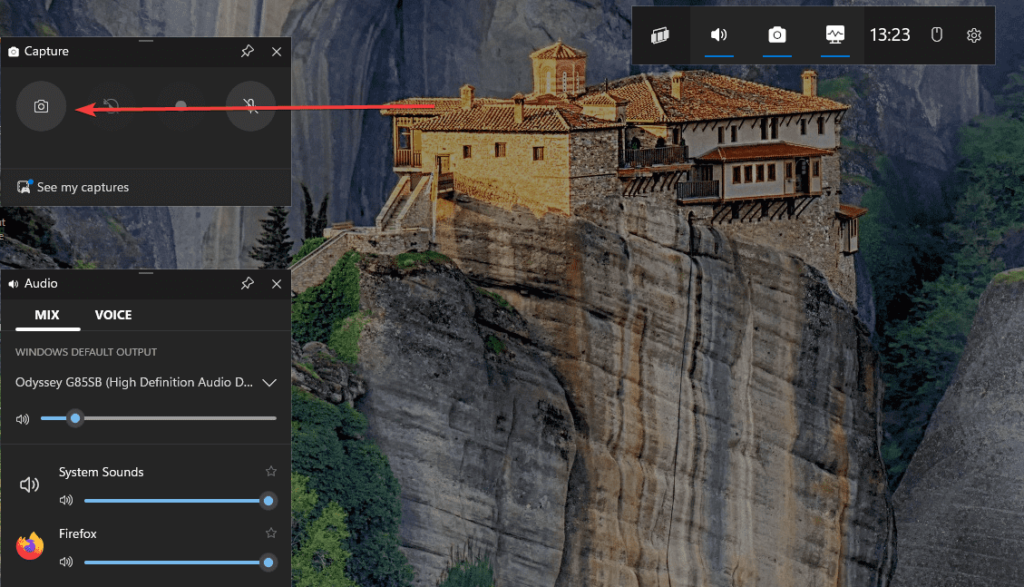
6. Using Xbox Game Bar (Indirect Method)
The Xbox Game Bar doesn’t directly allow cropped screenshots, but you can use image editing software to do so.
Steps:
- Press
Win + Gto open the Xbox Game Bar. - Click the Screenshot button to capture the entire screen.
- Open the screenshot in an image editor like Paint or Photos.
- Crop the image to the desired area and save it.
Conclusion
Windows 11 offers several intuitive methods for taking cropped screenshots with just one mouse click and dragging the pointer. If you don’t need to capture screenshots daily, we recommend the built-in Windows tools, such as the Snipping Tool and Snip & Sketch. However, advanced users can use third-party apps.
Other Articles:

