

Is your Windows 11 time zone incorrect? Maybe because you have updated your system, traveled somewhere, or did a fresh installation, the reason can be any, but if your system clock does not match your local time, here is the tutorial to fix it quickly.
There are three simple ways to change your time zone in Windows 11: one can use the built-in Settings App, command prompt, or PowerShell. Although we recommend using the Settings method, if you are an advanced user with a knowledge of commands, then you can go for CMD/Powershell. Let’s start the article…
Method 1: Change Time Zone via Settings (Easiest Way)
The Settings App on Windows 11 or 10 is the friendly way to update your time zone, and in this method, we learn how to use it following the given steps:
Steps to Change Time Zone in Windows 11 via Settings:
- Open Settings: To launch the Settings on Windows, the shortcut to use is
Win + I. Alternatively, one can get it by right-clicking the Start button and selecting the Settings option.
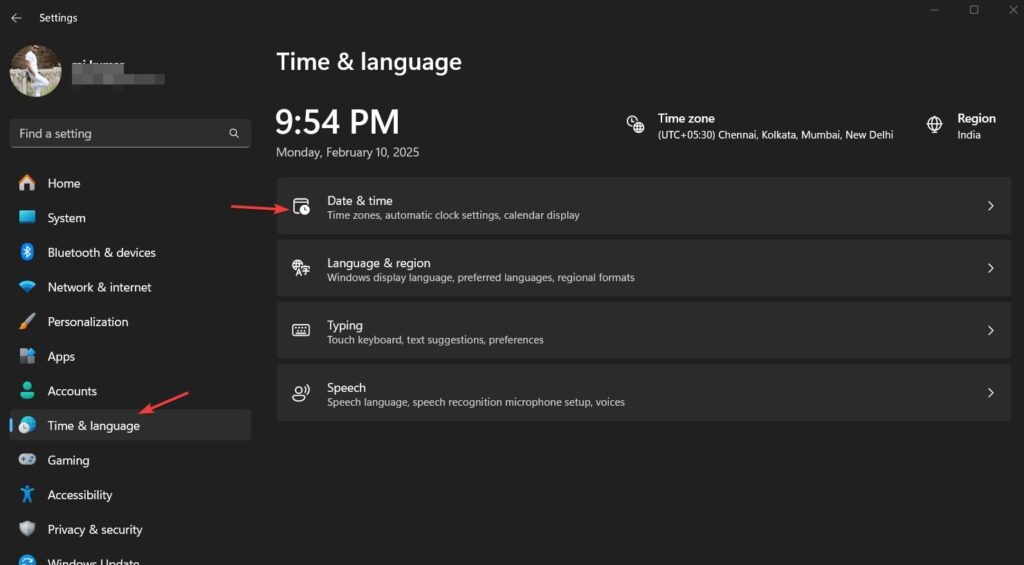
- Go to Time & Language: On the Settings App, you will have the “Time & language” option on the left sidebar panel; click that and move further.
- Select Date & Time: Open the “Date & time” settings.
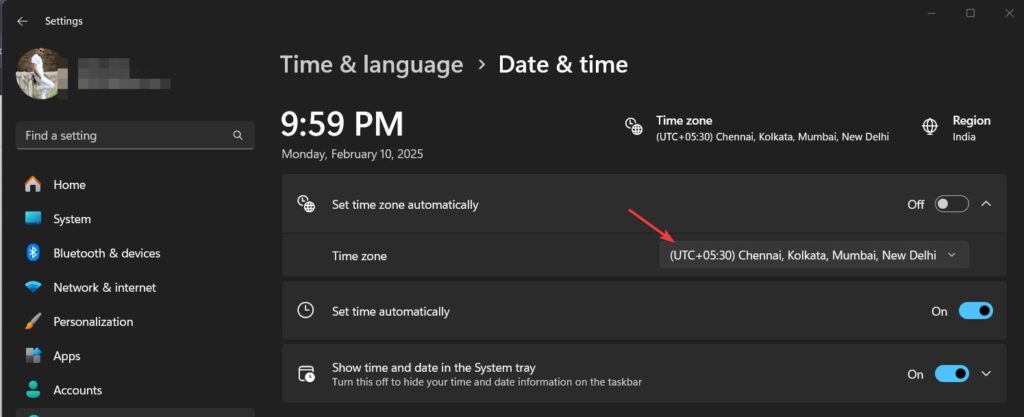
- Turn Off Automatic Time Zone (If Needed): If your time is inaccurate and the system is unable to fetch the time and data according to your PC or laptop location despite configuring the “Set time zone automatically” option enabled, then in such a situation, it is recommended to toggle this option Off.
- Choose Your Time Zone: After turning the automatic time zone off, click it to get the “Time zone” dropdown and select the correct one according to your current location or the one that you want to use.
- Restart Your PC (Optional): Changes apply immediately, but a quick restart ensures accuracy.
📌 Pro Tip: If your time keeps resetting, check the toggle button given for “Set time automatically” to turn it On in the same settings page as you can see in the above screen; we have done it already.
✅ Done! Your time zone is now updated.
Method 2: Change Time Zone via Command Prompt (For Advanced Users)
Even though the above-given method is user-friendly and easy to manage, why not use the command prompt if you prefer to use it? You can change your time zone with a simple command.
Steps to Change Time Zone in Windows 11 via CMD:
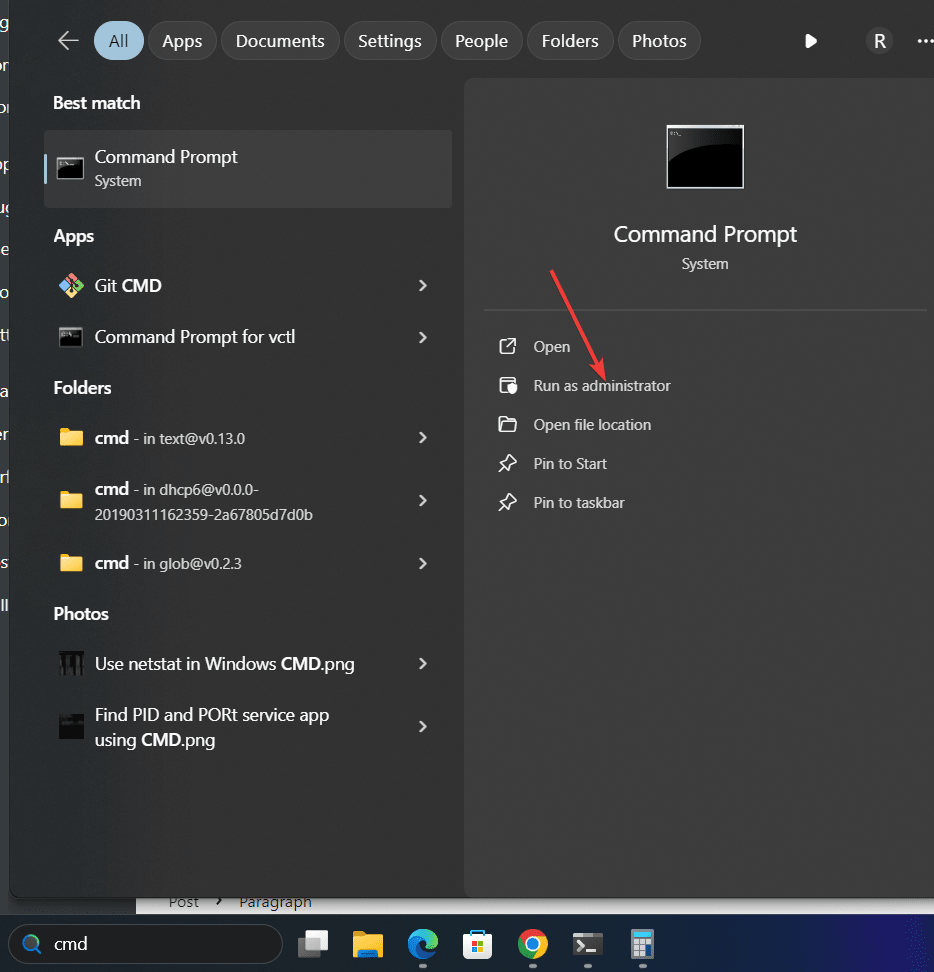
- Open Command Prompt as Administrator: Press
Win + Sor click the Start button and then type cmd. This will show the icon of the Command Prompt; there, select the “Run as administrator” option from the right side panel.
- Check Your Current Time Zone: First, let’s check the current Time zone configured on our Windows 11 or 10 system using a command on the prompt that will display your current time zone.
tzutil /g- List All Available Time Zones: We should know the available time zones on Windows so we can choose one to set. So, to show a list of time zones, use this step’s command on Windows 11 or 10 prompt. Find the one you want to use from the list.
tzutil /l- Set a New Time Zone: Once you have the correct name of the zone from the list, replace
"Time Zone Name"in the given command with that (e.g.,"Pacific Standard Time").
tzutil /s "Time Zone Name"📌 Example:
To set the time zone to India Standard Time, use:
tzutil /s "India Standard Time"- Verify the Changes: To confirm the changes, we can again check our current time zone using:
tzutil /g✅ Your time zone is now updated!
Method 3: Change Time Zone via PowerShell (Another Advanced Method)
Apart from Command Prompt, Advanced users can also use Windows PowerShell which is another powerful way to update the time zone.
Steps to Change Time Zone in Windows 11 via PowerShell:
- Open PowerShell as Administrator: Press
Win + Xkeys that will open the power menu on Windows, from where select the Terminal (Admin) option.
- Check Your Current Time Zone using the PowerShell command, which is different than Prompt; here is that:
Get-TimeZone- Now, let’s list all available time zones using the ListAvailable flag.
Get-TimeZone -ListAvailable- From the list of available Time zones, find the name of the zone you want to set, then replace “
Time Zone Name” in the given PowerShell command to set a correct new time zone:
Set-TimeZone -Id "Time Zone Name"- Confirm the Changes:
Get-TimeZone✅ Your new time zone is now active!
📌 Example:
To change the time zone to Central European Time, use:
Set-TimeZone -Id "Central European Standard Time"🔹 Frequently Asked Questions (FAQs)
1. Why is my Windows 11 time zone wrong?
Your time zone may be incorrect due to:
- Windows update issues
- Automatic time zone detection failure
- Manual changes or incorrect settings
Enable “Set time zone automatically” in Settings to fix this issue.
2. How do I set my time zone automatically in Windows 11?
Go to Settings → Time & language → Date & time, then toggle “Set time zone automatically” to On.
3. Can I change my time zone without administrator rights?
No, you need admin privileges to modify the time zone via Command Prompt or PowerShell. However, you can change it via Settings if your account has the necessary permissions.
Conclusion
Changing the time zone in Windows 11 is not a complicated task, as we have already seen with the help of this article. Now, as per your preference, you can use the GUI Settings method, which is suitable for general users, whereas advanced Windows owners can go for Command Prompt or PowerShell to set the correct time zone and avoid clock issues quickly.
🔹 For Beginners: Use Settings (Quick & Simple).
🔹 For Power Users: Use Command Prompt or PowerShell (Fast & Precise).
💬 Which method worked best for you? Let us know in the comments below! And if you found this guide helpful, don’t forget to share it! 🚀


