Are you new to Linux and looking to learn the basics of text editing? Look no further than VI (or VIM), the ubiquitous text editor that comes pre-installed on nearly every Linux distribution. While it may seem intimidating at first with its unique modal editing style, VI is a powerful tool that is well worth learning. In this beginner-friendly guide, we’ll walk you through the fundamentals of using VI to edit text files on Linux systems.
What is VI?
VI, which stands for “Visual Editor”, is a screen-oriented text editor originally created for the Unix operating system. Today, it is available on Linux, macOS, and other Unix-like systems. VI is known for its modal editing, where the meaning of typed keys depends on which mode the editor is in.
The original VI was developed by Bill Joy in 1976 as the visual mode for a line editor called EX. It has since been replaced by an improved version called VIM (VI Improved), which adds many useful features while maintaining backwards compatibility with the original VI.
Why Learn VI?
You may be wondering, with modern graphical text editors and IDEs available, why bother learning an old, terminal-based editor like VI? Here are a few compelling reasons:
-
VI is installed by default on virtually all Linux and Unix-based systems. Knowing the basics will allow you to edit text files on any system you log into.
-
VI is lightweight and fast, making it ideal for quick edits without the overhead of a graphical editor.
-
Many common Linux tools like
lessandmanuse VI-style key bindings, so familiarity with VI will make you more proficient on the command line overall. -
Mastering VI will greatly improve your speed and efficiency when editing code and configuration files.
-
VI has an extensive ecosystem of plugins and customizations that cater to specific editing needs, from syntax highlighting to version control integration.
Getting Started
To launch VI, simply open a terminal and type vi followed by the name of the file you want to edit (or create):
vi myfile.txt
If the specified file does not exist, VI will create a new blank file. If no filename is given, VI will open with an empty untitled document.
Modes in VI
One of the first things to understand about VI is its concept of modes. When you open a file in VI, you start in command mode, where typed keys are interpreted as commands that control the editor. To enter text, you must switch to insert mode. Let’s look at the three main modes:
Command Mode
When you first open VI, you are in command mode. In this mode, every key is a command that performs a specific action, such as navigating through the document, deleting text, or changing options. For example:
- Use the arrow keys or
h,j,k,lto move the cursor around xdeletes the character under the cursordddeletes the current line:wsaves the file:qquits VI
Insert Mode
To enter text into the document, you need to switch to insert mode. Press i to enter insert mode at the cursor position. Now any keys you type will be inserted into the document at the cursor position. To return to command mode, press Esc.
There are a few other ways to enter insert mode:
aappends text after the cursoroinserts a new line below the current one and enters insert modeOinserts a new line above the current one and enters insert mode
Visual Mode
Visual mode allows you to visually select text in the document for manipulation. Press v to enter visual mode, then use the arrow keys or VI movement commands to select text. Once selected, you can perform operations on the highlighted text, such as:
dto delete the selected textyto “yank” (copy) the selected text>to indent the selected lines
Press Esc to exit visual mode and return to command mode.
Basic Editing
Now that you understand VI’s modal editing system, let’s look at some basic editing tasks.
Editing Text
From command mode:
ienters insert mode at the cursoraenters insert mode after the cursorxdeletes the character under the cursordddeletes the current lineyyyanks (copies) the current lineppastes the last deleted or yanked text after the cursoruundoes the last change
Saving and Quitting
To save your changes, type :w in command mode and press Enter. To quit VI, type :q and press Enter. If you have unsaved changes, VI will warn you and refuse to quit. To discard your changes and quit anyway, use :q!. To save and quit in one command, type :wq.
Your Turn!
Now that you’ve learned the basics of VI, it’s time to practice! Open a new file in VI and try out the following:
- Enter insert mode and type a few lines of text
- Use the movement keys to navigate around and make some edits
- Yank and paste a line of text
- Save the file and quit VI
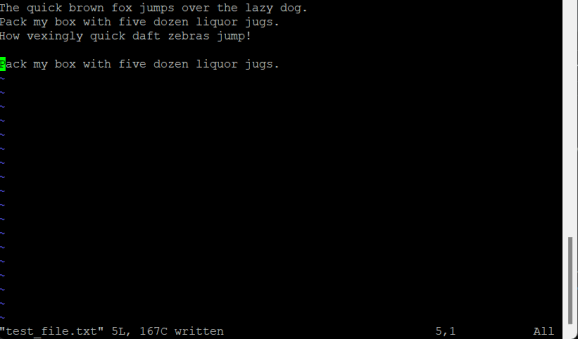
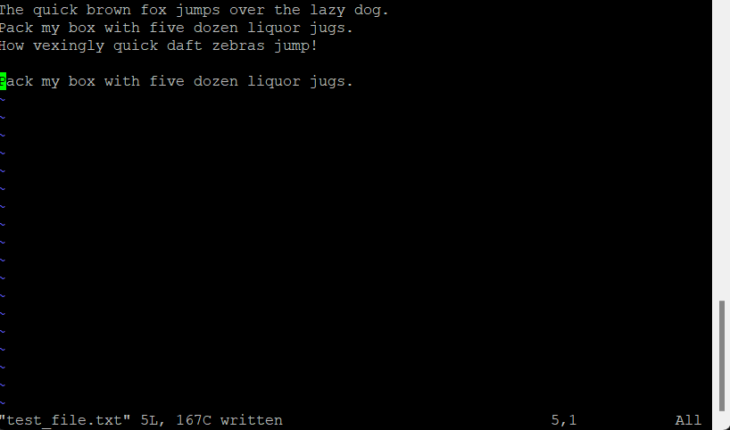
Here’s a sample text you can use:
The quick brown fox jumps over the lazy dog.
Pack my box with five dozen liquor jugs.
How vexingly quick daft zebras jump!
Click Here For Solution!
-
Open a new file in VI by typing
vi test_file.txtin your terminal. -
Press
ito enter insert mode and type the sample text:
The quick brown fox jumps over the lazy dog.
Pack my box with five dozen liquor jugs.
How vexingly quick daft zebras jump!
-
Press
Escto return to command mode. -
Use
h,j,k,lor arrow keys to move the cursor around the text. Make some edits, such as changing “jumps” to “leaps” in the first line. -
Move the cursor to the second line and press
yyto yank (copy) the line. -
Move the cursor to the end of the file and press
pto paste the yanked line. -
To save the changes, type
:win command mode and press Enter. -
To quit VI, type
:qand press Enter.
Congratulations, you’ve just completed your first VI editing session! With practice, these commands will become second nature, and you’ll be able to efficiently navigate and edit text files in any Unix-based environment.


Quick Takeaways
- VI is a powerful terminal-based text editor with a modal editing system
- Command mode is for entering commands, insert mode is for text input
- Use
h,j,k,lor arrow keys to navigate in command mode - Switch between modes with
i,Esc,v :wsaves,:qquits,:wqsaves and quits
Conclusion
Congratulations, you now know the basics of using the VI editor on Linux! While it takes some practice to master the key commands and modal editing style, the effort you put in will pay off in your future Linux endeavors. VI is an indispensable tool for system administrators, developers, and power users.
To further hone your skills, spend some time each day editing files in VI. You’ll be surprised how quickly the key bindings will become second nature. As you gain proficiency, you can explore VI’s more advanced features like macros, split windows, and customizing your configuration.
FAQs
Q: What is the difference between VI and VIM?
A: VIM is an enhanced version of the original VI editor, with additional features and customization options. However, VIM maintains backwards compatibility with VI, so the core functionality is the same.
Q: Can I use the mouse in VI?
A: VI was designed for a mouse-free workflow, so it relies on keyboard commands for all navigation and editing tasks. However, some modern versions of VIM do include mouse support as an optional feature.
Q: How can I customize VI to my liking?
A: VI looks for a configuration file called .vimrc in your home directory. Here you can set your preferred options, define custom key mappings, and more. See the VIM documentation for a full list of available settings.
Q: Is it worth learning VI if I already use a graphical editor?
A: Absolutely! VI is a fundamental tool that every Linux user should know. Not only is it ubiquitous across all Unix-like systems, but mastering VI will also make you more efficient in terminal-based workflows. That said, there’s nothing wrong with using a graphical editor when it makes sense.
Q: Can I use VI to edit code with syntax highlighting?
A: Yes, VIM has excellent support for syntax highlighting for hundreds of programming languages and file formats. It also has features like code folding, auto-indentation, and plugins for specific languages and frameworks.
I hope this gentle introduction to VI has piqued your interest and encouraged you to explore this classic Linux tool. Stick with it, and you’ll be editing like a pro in no time! Let me know if you have any other questions.
References
-
“Learning The vi Editor” – Wikibooks, https://en.wikibooks.org/wiki/Vi
-
“The Vim Book” – Steve Oualline, //ftp.vim.org/pub/vim/doc/book/vimbook-OPL.pdf
-
“Bill Joy” – Wikipedia, https://en.wikipedia.org/wiki/Bill_Joy
-
“Bram Moolenaar” – Wikipedia, https://en.wikipedia.org/wiki/Bram_Moolenaar
Happy Coding! 🚀


You can connect with me at any one of the below:
Telegram Channel here: https://t.me/steveondata
LinkedIn Network here: https://www.linkedin.com/in/spsanderson/
Mastadon Social here: https://mstdn.social/@stevensanderson
RStats Network here: https://rstats.me/@spsanderson
GitHub Network here: https://github.com/spsanderson
Bluesky Network here: https://bsky.app/profile/spsanderson.com
Related


