AutoHotkey is a powerful scripting language for Windows that allows users to automate repetitive tasks. It can also create keyboard shortcuts, remap keys, etc. It’s popular among enthusiasts and developers for increasing productivity and offering various customization options to enhance the Windows experience.
Using the Windows package manager, also known as Winget, we can install AutoHotkey in the blink of an eye using a single command. This article discusses installing AutoHotkey on Windows using WinGet, so you don’t need to open a browser or surf websites to install a program.
Step 1: Open the Command Prompt or PowerShell
To install AutoHotkey using WinGet, you must open Command Prompt or PowerShell with administrator privileges.
- Open the Start Menu and type “cmd” or “PowerShell.”
- Right-click and select Run as administrator.
Step 2: Install Winget (If Not Already Installed)
Microsoft’s Windows Package Manager (WinGet) comes as a pre-installed application in all the latest versions of both Windows 11 and 10; however, to confirm whether it is on your system or not, on the CMD or PowerShell Run:
winget --versionIf WinGet is recognized, you’re all set to proceed. If not, you may need to update Windows or install the App Installer from the Microsoft Store.
Step 3: Search for AutoHotkey Package
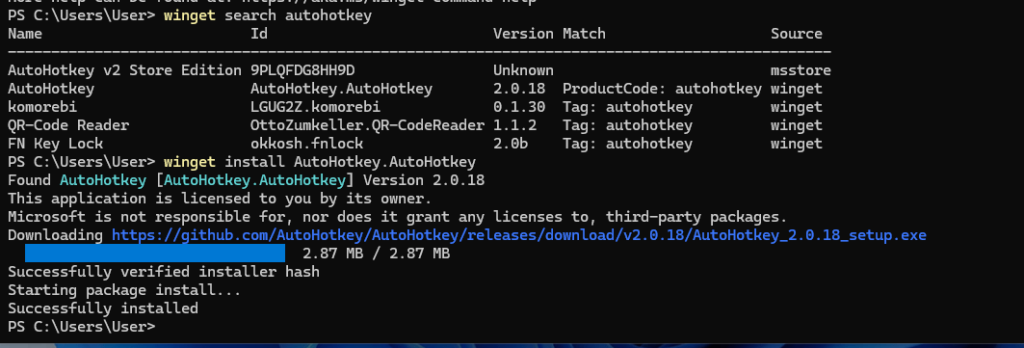
Let’s first check whether the package we need to install is available in the Winget repository. To do that, we can search for AutoHotkey using the command that lists the available versions of AutoHotkey.
winget search AutoHotkey
Step 4: Install AutoHotkey using Winget
In the result, you will see the package details along with the App ID we can use to install AutoHotKey:
winget install AutoHotkey.AutoHotkey
Step 5: Verify Installation on Windows 11 or 10
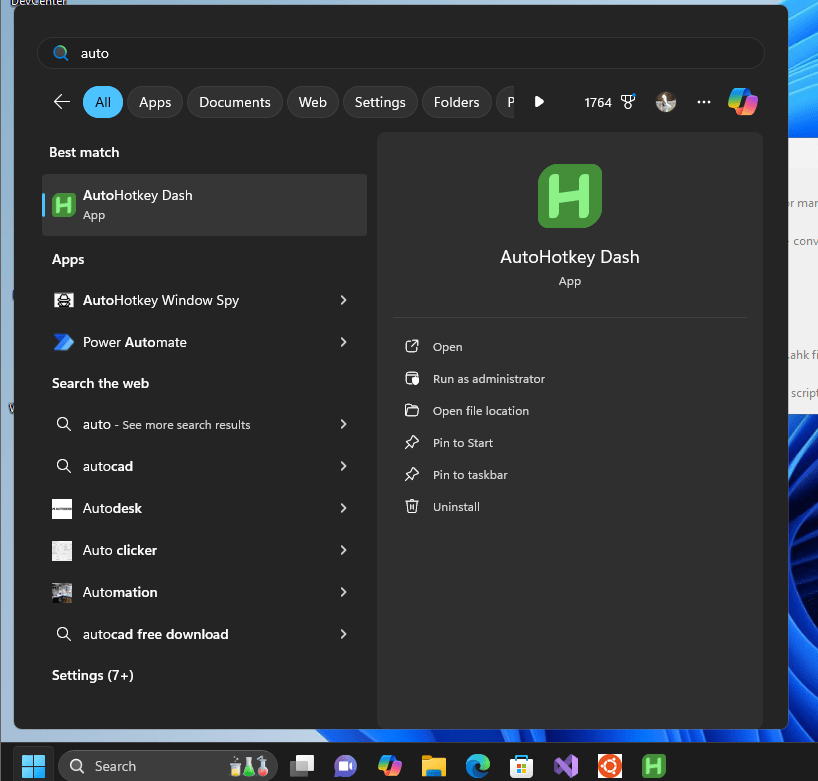
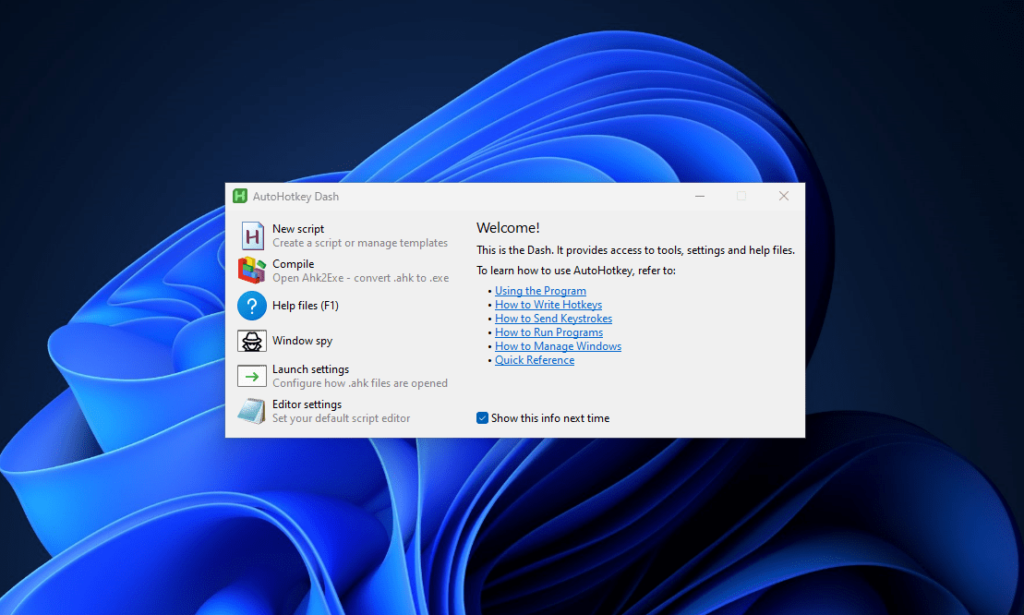
We can confirm that the installation is done correctly by running the application. To do so, Click the Start Menu and search for AutoHotkey; as its icon appears, click to run it.


Step 6: Launch and Test AutoHotkey
- AutoHotkey scripts usually have a
.ahkfile extension. To test your installation: - Create a new text file on your desktop; name it
Test. - Add the following sample script to open Notepad with a keyboard shortcut, i.e., Ctrl+N.
^n:: { ; Ctrl + N
    Run "notepad.exe"
}
Click on the File menu of Notepad, select the “Save as” option, or press Ctrl+Shift+S to save the file with the extension “.ahk“. That means the file will be “Test.ahk”. Once done, double-click it to launch the script.
Now, whenever you press Ctrl + N, the Notepad will open automatically, showing that the AutoHotkey is working fine. Check out the official documentation to learn more about AutoHoteky and its commands.
Updating or Uninstalling AutoHotkey with WinGet
With WinGet, managing your AutoHotkey installation is straightforward.
To update AutoHotkey:
winget upgrade AutoHotkey.AutoHotkeyTo uninstall AutoHotkey:
winget uninstall AutoHotkey.AutoHotkeyThese commands ensure that your AutoHotkey installation remains up-to-date or can be removed.
Conclusion
Well, in the steps of this tutorial, we have seen that installing AutoHotkey using the Winget is quick and efficient. Using AutoHotkey, users can harness the power of Windows automation by simplifying repetitive tasks, creating custom shortcuts, and enhancing their productivity with custom scripts.
Other Articles:


