

Are your file thumbnails missing, not updating, or showing blank icons in Windows 11? If yes, there might be a problem with the thumbnail cache; it could be corrupted or broken. So, how are you going to fix this? If you are unaware of it, the cache files play an essential role in quickly displaying the previews of images, videos, and other documents on Windows, which gives an idea of what a file contains without actually opening it.
Therefore, for those facing thumbnail problems, here are some solutions that could quickly solve and fix the thumbnail cache issues in Windows 11. Well, although different users have different problems and concerns, nevertheless, what we have shown in this article are the 5 proven ways to repair and refresh the thumbnail cache.
Method 1: Manually Clear & Rebuild Thumbnail Cache (Quick Fix)
The straightforward way to fix the Thumbnail issues is to clear and rebuild the thumbnail cache on Windows manually; here are the steps to follow:
Steps to Clear Thumbnail Cache in Windows 11:
- Open the Windows command run box by pressing Win+R, then type cleanmgr, and hit the Enter key.
- Next, Select Your Drive where Windows 11 or 10 is installed, which is generally the C: Drive; hence, let it be selected and press the OK button.
- The system will scan and show the junk files that can be selected for deletion. Scroll and check the box for “Thumbnails” (Uncheck everything else if you only want to clear thumbnails).
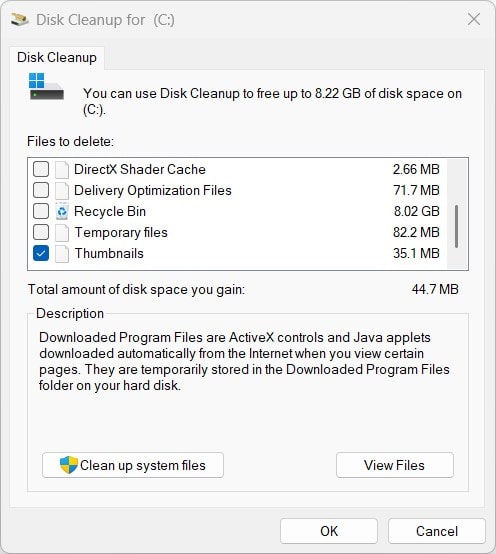
- After that, press OK to finally delete the Thumbnail Cache.
- Restart Your PC: This ensures Windows regenerates new thumbnails.
✅ Your thumbnail cache is now rebuilt! If this doesn’t fix the issue, try the following other methods.
📌 Pro Tip: If your thumbnails keep disappearing, disable automatic thumbnail deletion (explained later).
Method 2: Reset Thumbnail Cache via Command Prompt
For many users, the graphical method to reset the cache would not work correctly; they can use the command prompt (CMD) to delete and refresh the thumbnail cache.
Steps to Reset Thumbnail Cache via CMD:
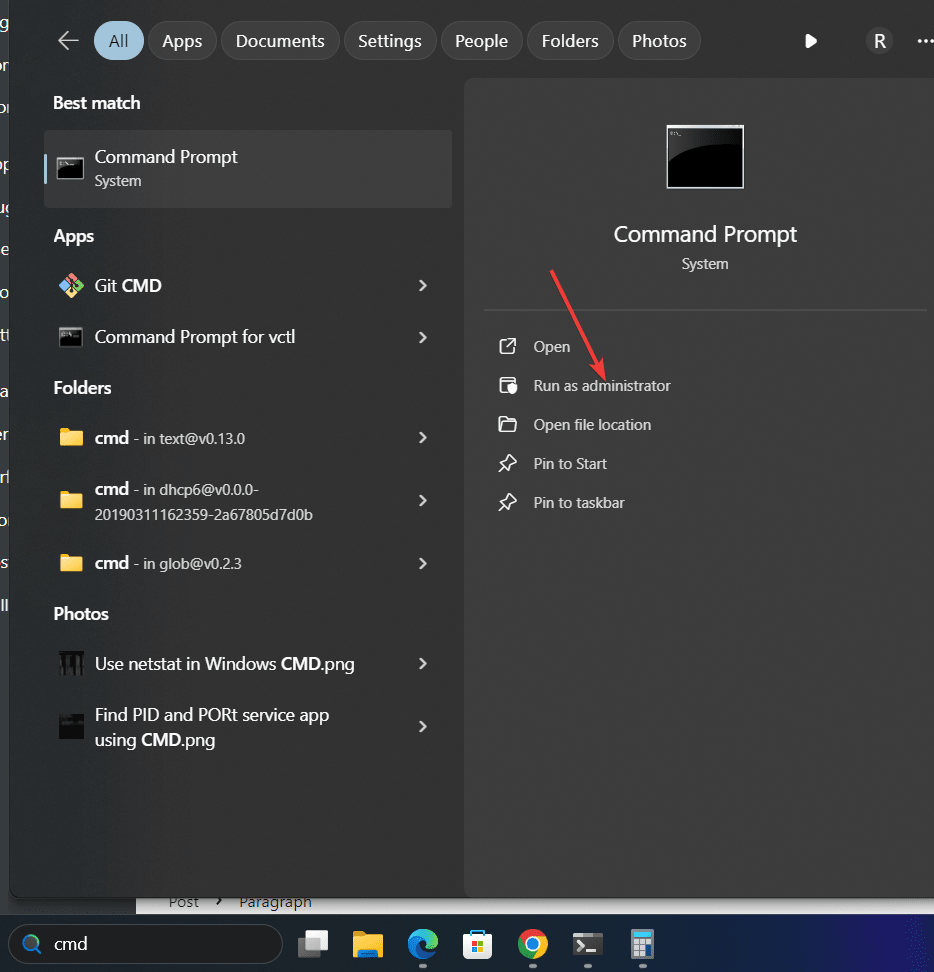
- Start the Windows Command Prompt with Administrator rights, press
Win + S, type cmd, and click Run as the administrator option appears on the right side pane.
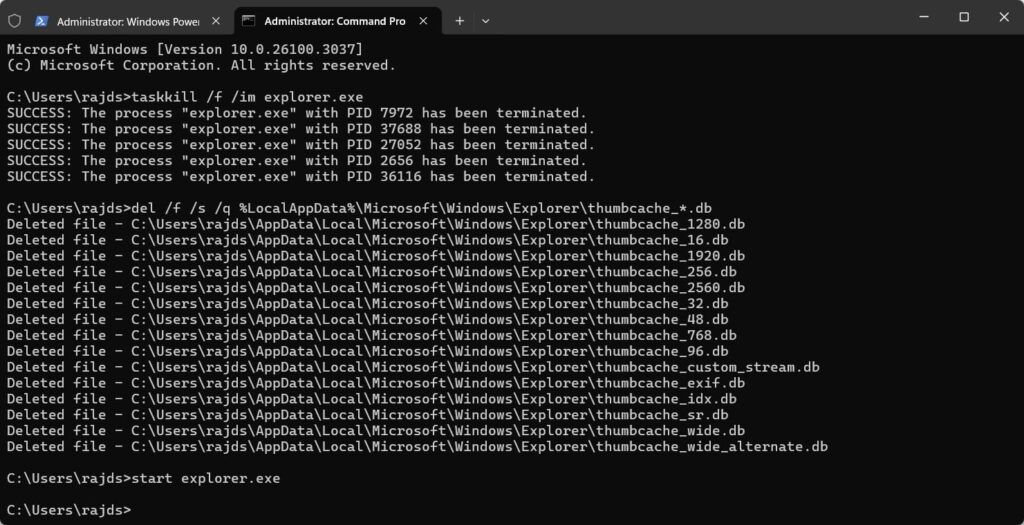
- Next, stop the Thumbnail Cache Process by killing the Explorer.exe system process. One thing that needs to be known is that by running the given command, the Taskbar will disappear but come back as we run the command given in Step 4, so don’t worry.
taskkill /f /im explorer.exe- Delete Thumbnail Cached database Files with the help of the “del” command in the prompt.
del /f /s /q %LocalAppData%\Microsoft\Windows\Explorer\thumbcache_*.db- After removing the cache database, restart the Windows Explorer service to get it back.
start explorer.exe✅ Thumbnails should now be refreshed!
📌 Pro Tip: If the issue persists, try restarting your PC after running these commands.
Method 3: Enable Thumbnails in File Explorer Settings
Even after following all the previous ways, thumbnails still do not appear; then, it may be disabled in File Explorer settings. Let’s check and fix that.
Steps to Enable Thumbnails in Windows 11:
- On Windows 11 or 10, open your File Explorer or use the keyboard shortcut
Win + E. - After that, on the Top bar, click the three dots (…) and select Options.
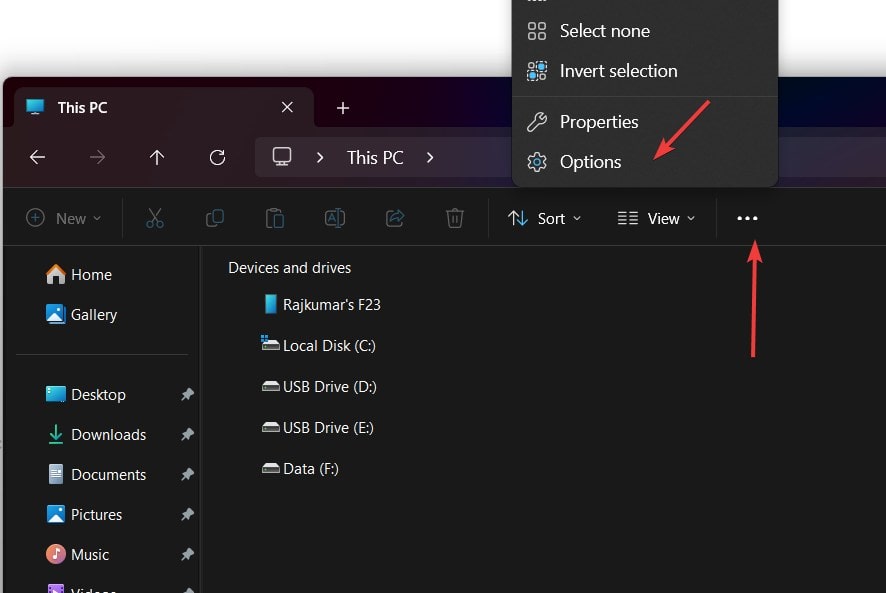
- Switch to the “View” tab in the Folder Options window.
- Scroll to Find and Uncheck “Always show icons, never thumbnails.”
- Click Apply > OK.
- ✅ Thumbnails should now be visible again!
Method 4: Restart Windows Explorer (Temporary Fix)
Sometimes, the Windows Explorer process glitches, causing thumbnails to disappear. In such a situation, a quick Explorer service restart can help.
Steps to Restart Windows Explorer:
- 1️⃣ Open Task Manager: Press
Ctrl + Shift + Esc. - 2️⃣ Find “Windows Explorer” in the Processes Tab.
- 3️⃣ Right-click and Select “Restart.”
- ✅ Your thumbnails should reload instantly!
- 📌 Pro Tip: If this is a frequent issue, a corrupted system file might be causing it (check Method 5).

Method 5: Repair Corrupted System Files (Advanced Fix)
If your thumbnail cache keeps getting corrupted, system file corruption may be the cause. Running a System File Checker (SFC) scan can fix this.
Steps to Repair System Files Using SFC & DISM:
- 1️⃣ Press
Win + S, type cmd, right-click Command Prompt, and select Run as administrator. - 2️⃣ Run an SFC Scan: This will scan and repair any corrupted system files.
sfc /scannow- 3️⃣ Run a DISM Scan (If SFC Fails):
DISM /Online /Cleanup-Image /RestoreHealth- ✅ Once the scans are complete, restart your PC and check your thumbnails!
- 📌 Pro Tip: Running both SFC and DISM ensures deep system repair.
Recommendation:
🔹 For Quick Fixes: Try Manual Cache Cleanup (Method 1).
🔹 For Advanced Users: Use CMD Commands (Method 2).
🔹 For Long-Term Fixes: Prevent auto-deletion via Registry Edit (FAQ #2).
🔹 Frequently Asked Questions (FAQs)
1. Why do my thumbnails keep disappearing in Windows 11?
Your thumbnails may disappear due to:
- Corrupted cache files
- Windows cleaning thumbnails automatically
- File Explorer settings disabling thumbnails
Try Method 1 (Cache Cleanup) or Method 3 (Explorer Settings) to fix it.
2. How do I stop Windows 11 from deleting the thumbnail cache automatically?
Windows 11 sometimes deletes thumbnails during disk cleanup. To prevent this:
- 1️⃣ Open Registry Editor (
Win + R → type regedit → Enter). - 2️⃣ Navigate to:
HKEY_LOCAL_MACHINE\SOFTWARE\Microsoft\Windows\CurrentVersion\Explorer\VolumeCaches\Thumbnail Cache- 3️⃣ Double-click “Autorun” → Change the value to 0.
- 4️⃣ Restart your PC.
Now, Windows will stop auto-deleting thumbnails!
3. My video thumbnails are not showing, only images. Why?
Windows may not be generating thumbnails for specific video formats. Install a codec pack like K-Lite Codec Pack to fix this.
Conclusion
We have seen multiple ways to fix thumbnail cache issues in Windows 11, and although all of them are easy to use, they may not work in all circumstances. Therefore, try them individually; maybe your luck will work, and you can solve your problem. Whether it is clearing the cache, tweaking settings, or repairing system files, this guide can restore thumbnails quickly.


