Kali Linux is famous for its ability to test networks and other security measures. Due to its robust set of pre-installed tools designed for penetration testing, digital forensics, and security research, it has been used by many cybersecurity professionals, ethical hackers, and IT enthusiasts.
Those who are using Windows 11 and are interested in learning or using Kali Linux but without removing their primary OS, Windows, can check out the multiple ways we have discussed to install and run it seamlessly alongside Windows.
Installing Kali Linux on Windows 11 can be done in a few different ways, depending on your needs and preferences; whether you’re a beginner or an advanced user, you’ll find a method here that suits your needs; here are three standard methods:
- Using Windows Subsystem for Linux (WSL)—The most common method of experiencing Kali Linux with a terminal-based environment is to run it on WSL. This lightweight option allows Windows 11 users to use Kali Linux without dual-booting or using a virtual machine. However, you won’t have a complete desktop environment, but it’s excellent for command-line tools.
- Using VirtualBox or VMware—Another great way to run a full-fledged desktop Kali Linux in an isolated environment is to use virtual machines. VirtualBox and VMware are popular applications for creating virtual machines on Windows 11.
- Dual-Booting— This method installs Kali Linux directly on your system alongside Windows 11, allowing you to choose which OS to boot into at startup. However, it is a bit complicated for beginners. If the partitioning on the hard drive for Kali Linux is not done correctly while installing, the primary OS could be unbootable. Hence, this method is generally suited for users with more experience.
Here are step-by-step guides for each method.
Method 1: Installing Kali Linux with Windows Subsystem for Linux (WSL)
Step 1: Enable WSL
- Open PowerShell as an Administrator. Right-click the Start menu and select Windows Terminal (Admin) or PowerShell (Admin).
- Run the following command to enable WSL and Virtual Machine Platform:
wsl --install - This command installs both WSL and Ubuntu by default. If you already have WSL installed, make sure it’s set to version 2 with:
wsl --set-default-version 2- Restart your computer to apply the changes.
Step 2: Install Kali Linux from Microsoft Store
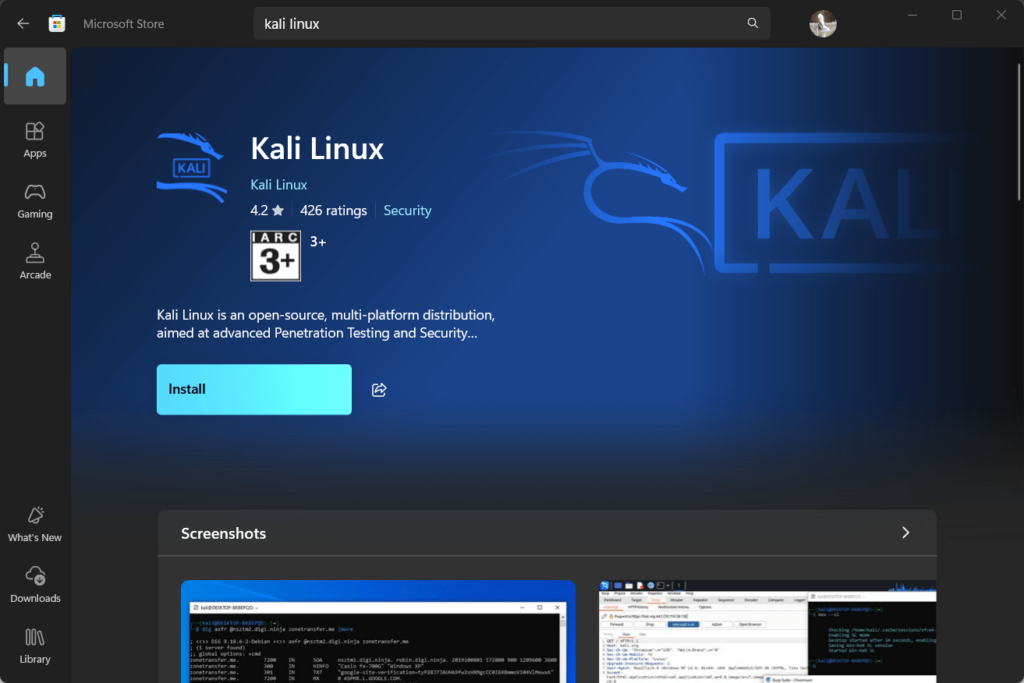
- Open the Microsoft Store app on Windows 11.
- Search for Kali Linux.
- Click Get or Install to download and install Kali Linux on WSL.

Step 3: Launch and Configure Kali Linux
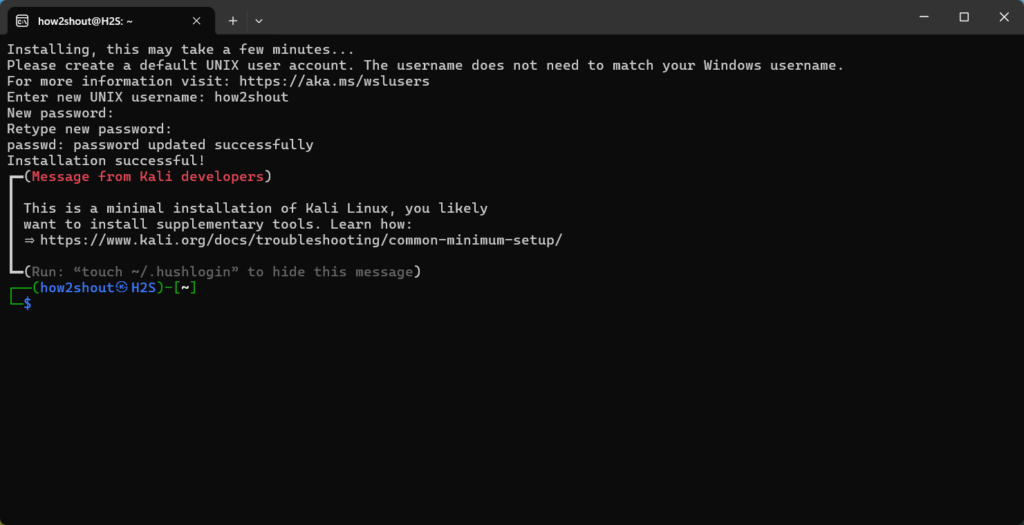
- Open Kali Linux from the Start menu. The first time you launch it, WSL will set up the environment.
- Set up a new username and password as prompted.
Now, you can run Kali Linux commands directly in Windows. You can open Kali by searching for it in the Start menu or running “wsl” in a command prompt. Also, check out – Install KALI Linux with Desktop on WSL

Method 2: Installing Kali Linux in VirtualBox or VMware
Those who want to experience the full-fledged Kali Linux but are in an isolated environment can install Kali on VirtualBox or VMware. We have provided quick steps and also a link to our complete guide, which explains step-by-step instructions for installing Kali on a virtual machine.
Follow the quick steps below to check out the detailed guides, learn how to download the VMware Workstation on Windows for free, and then install Kali Linux.
Step 1: Download VirtualBox or VMware Workstation Player
- Go to the VirtualBox download page or VMware Workstation Player.
- Download and install the virtual machine software of your choice.
Step 2: Download the Kali Linux ISO File
Step 3: Create a New Virtual Machine
- Open VirtualBox or VMware and click New to create a new virtual machine.
- Set the name to “Kali Linux” and choose the following settings:
- Type: Linux
- Version: Debian (64-bit)
- Assign memory (RAM) to the virtual machine. 2 GB (2048 MB) is recommended, but you can allocate more if you have enough RAM.
- Create a virtual hard disk. 20 GB or more is recommended.
Step 4: Configure the VM to Use the Kali Linux ISO
- Select the Kali Linux VM and go to Settings.
- Click on the Empty disk under Controller: IDE in the Storage section.
- Click the disk icon on the right side and choose Choose a disk file….
- Select the downloaded Kali Linux ISO file.
Step 5: Install Kali Linux in the Virtual Machine
- Start the virtual machine. It will boot from the Kali Linux ISO.
- Follow the installation instructions:
- Choose Graphical Install.
- Select your language, region, and keyboard settings.
- Configure the network and set up a username and password.
- Partition the virtual hard disk and install the system.
- Once installation is complete, restart the virtual machine.
You now have a fully functional Kali Linux virtual machine running within Windows 11. Learn a step-by-step guide to installing Kali Linux on VirtualBox or a guide to setting up Kali on Vmware Player.
Method 3: Dual-Booting Kali Linux and Windows 11
Warning: This method involves partitioning your hard drive. Make sure to back up your data before proceeding.
Step 1: Create a Bootable USB for Kali Linux
- Download the Kali Linux ISO from the Kali Linux download page.
- Download Rufus to create a bootable USB drive.
- Insert a USB drive (at least 8 GB) and open Rufus.
- Select your USB drive, choose the Kali Linux ISO file, and click Start to create a bootable USB.
Step 2: Shrink Windows Partition
- Press Win + X and select Disk Management.
- Right-click on your primary Windows partition (usually C:) and select Shrink Volume.
- Shrink the partition to free up space for Kali Linux (at least 20 GB).
Step 3: Boot from the USB Drive
- Restart your computer and enter the BIOS/UEFI settings (usually by pressing F12, F2, Delete, or Esc during startup).
- Change the boot order to prioritize USB boot.
- Boot from the Kali Linux USB drive.
Step 4: Install Kali Linux
- Select Graphical Install and follow the prompts.
- Choose language, region, and keyboard settings.
- When you reach the partitioning section, select Manual and allocate the free space you created earlier:
- Create a root partition (
/) and a swap partition if desired.
- Create a root partition (
- Complete the installation, and install the GRUB bootloader when prompted.
Step 5: Restart and Choose Operating System
- After installation, restart your computer.
- The GRUB bootloader will allow you to select either Windows 11 or Kali Linux at startup.
Now, you can choose between Windows 11 and Kali Linux each time you boot up your system.
Conclusion
These three methods provide different ways to use Kali Linux on a Windows 11 machine, depending on your needs:
- WSL is ideal if you only need Kali Linux command-line tools without an entire desktop experience.
- Virtual machines (VirtualBox or VMware) offer a complete Kali Linux environment without altering your Windows installation.
- Dual-booting provides full system performance for both operating systems but requires disk partitioning.
Each method has advantages and setup requirements, so choose the one that best fits your workflow. With these setups, you can try out Kali Linux’s powerful tools without losing access to your Windows 11 or 10.
Other Articles:


